In ASG Mobius 10.1, Mobius introduced the ability to make metadata corrections on content that has been previously ingested. In order to use the new metadata correction features, some pre-planning and configuration needs to be done.
You will need the following:
- An installed version of Mobius 10.1 (or newer).
- The login information for Mobius Admin and the Mobius Server. The defaults are, respectively, admin/admin and ADMIN/<blank>.
This demonstration is done using the latest version, Mobius 11, which utilizes a browser interface. Those using an earlier version will use an application based User Interface (UI). Let’s get started!
1. Navigate to Mobius Admin

- The Mobius Server is an option on the left hand toolbar. If it is not the second to last option, you will need to navigate to the “…” section and scroll down to locate it.
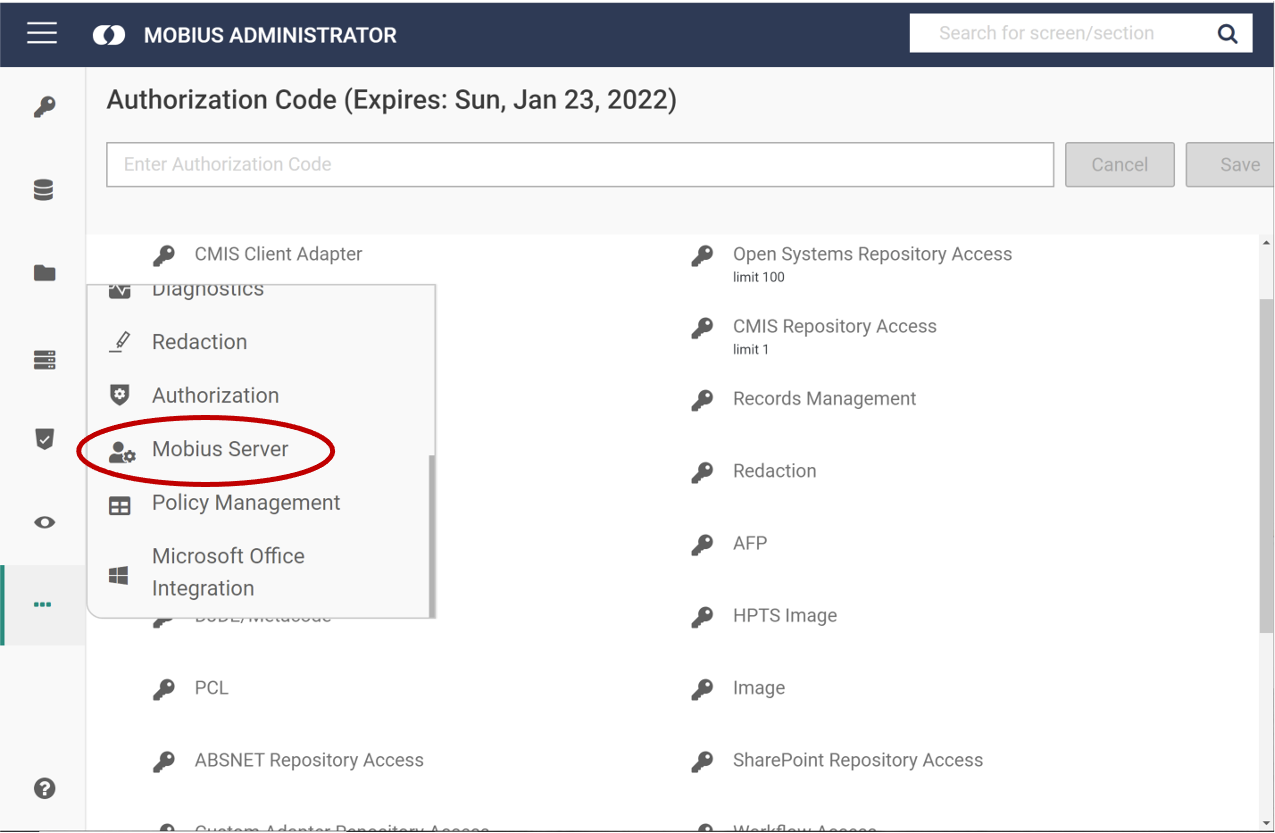
- You should now see something like this:
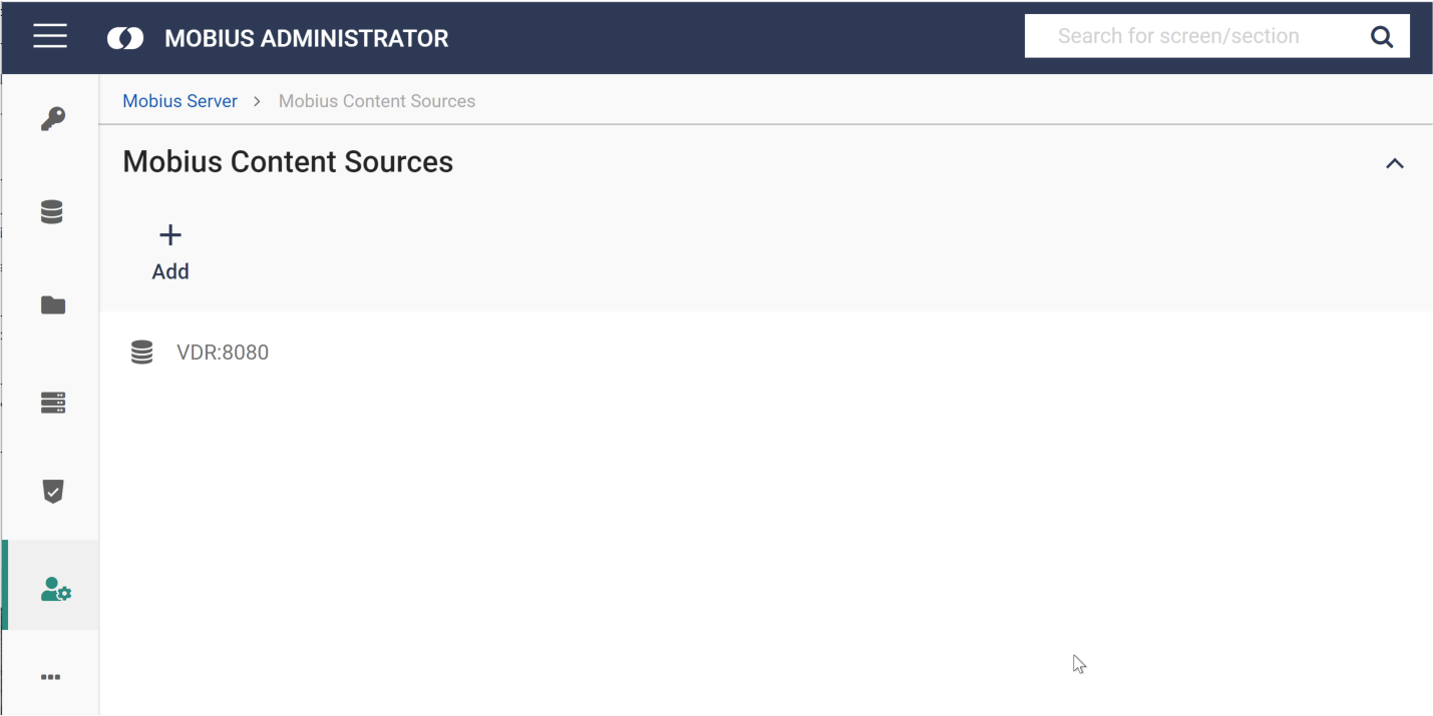
- After you select the Content Source and the Document Server, you will be prompted to login again. At this point, you enter the credentials for your Mobius Server.
- Use the default, ADMIN/<blank>, unless your credentials are different. It’s important to note that your login for the Mobius Server may be different from your login for the Mobius View Administrator used in the previous step. Once you have done this, you will see the following screen:
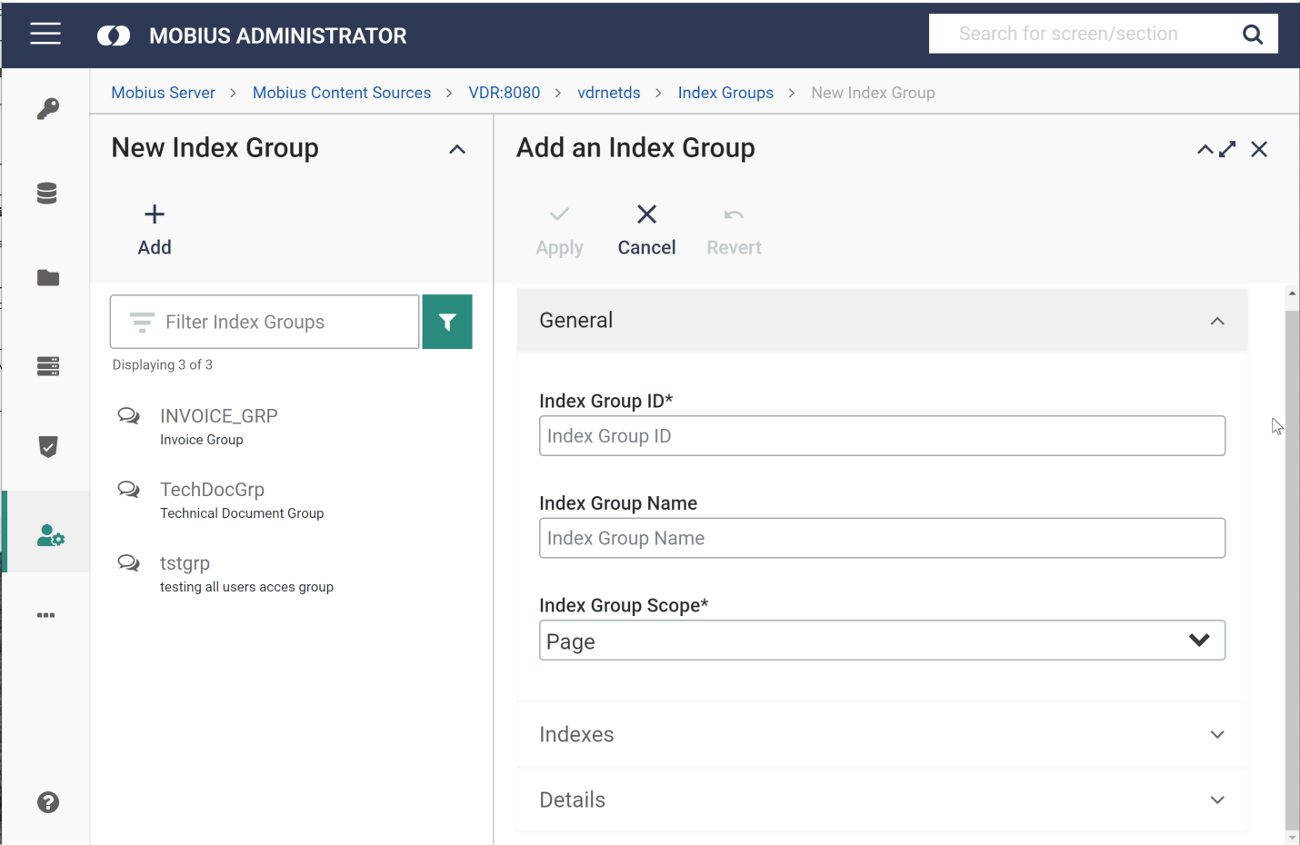
2. Add an Index Group
-
Now you can create Indexes where metadata will be stored. You can only do metadata correction on information stored in an Index Group. Start by selecting those groups.
-
Give the Index Group a name and description. Then, add it to the Member Indexes in the Indexes drop down menu. Some important things to note include:
-
-
-
Index names are limited to 10 characters with no spaces.
-
Member Indexes cannot be changed without recreating the entire Index and deleting the previous version. This would require you to reconfigure everything using that Index or Index Group. Therefore, it is important to review thoroughly before you submit.
-
-
3. Select the Content Class
- Skip this step if you already have a Content Class you plan to use. Otherwise, navigate back to the Main Menu of the Mobius Server and select Content Class to add a new Content Class and give it a name and description.
- Select the Filename dropdown and give it a Template for storage. This can be anything you want but must end in .DAF. There are placeholders to help you create this name. You can have it be a nested location.
4. Create Mobius View Users and Permissions
- Navigate to the Mobius Server Main Menu and select Users.
- Add at least two users. You do not need to assign a password during setup. You can always add/change it later if you choose. For the sake of this example, passwords will not be assigned to the two users, AlexRequestor and SamCorrector.
- Apply permissions at the User level. This can become very tedious, as every user will need permissions assigned individually. I suggest that you use User Groups for this because adding new users to groups and assigning permissions only happens once.
- Give both users access to the Content Class and Index Group Members you already created. Set the Content Class section to “*” to make sure users have access to everything.
- Limit access to the data sets you choose. For example, you can limit it to everything starting with A-N. This is not necessary in this example.
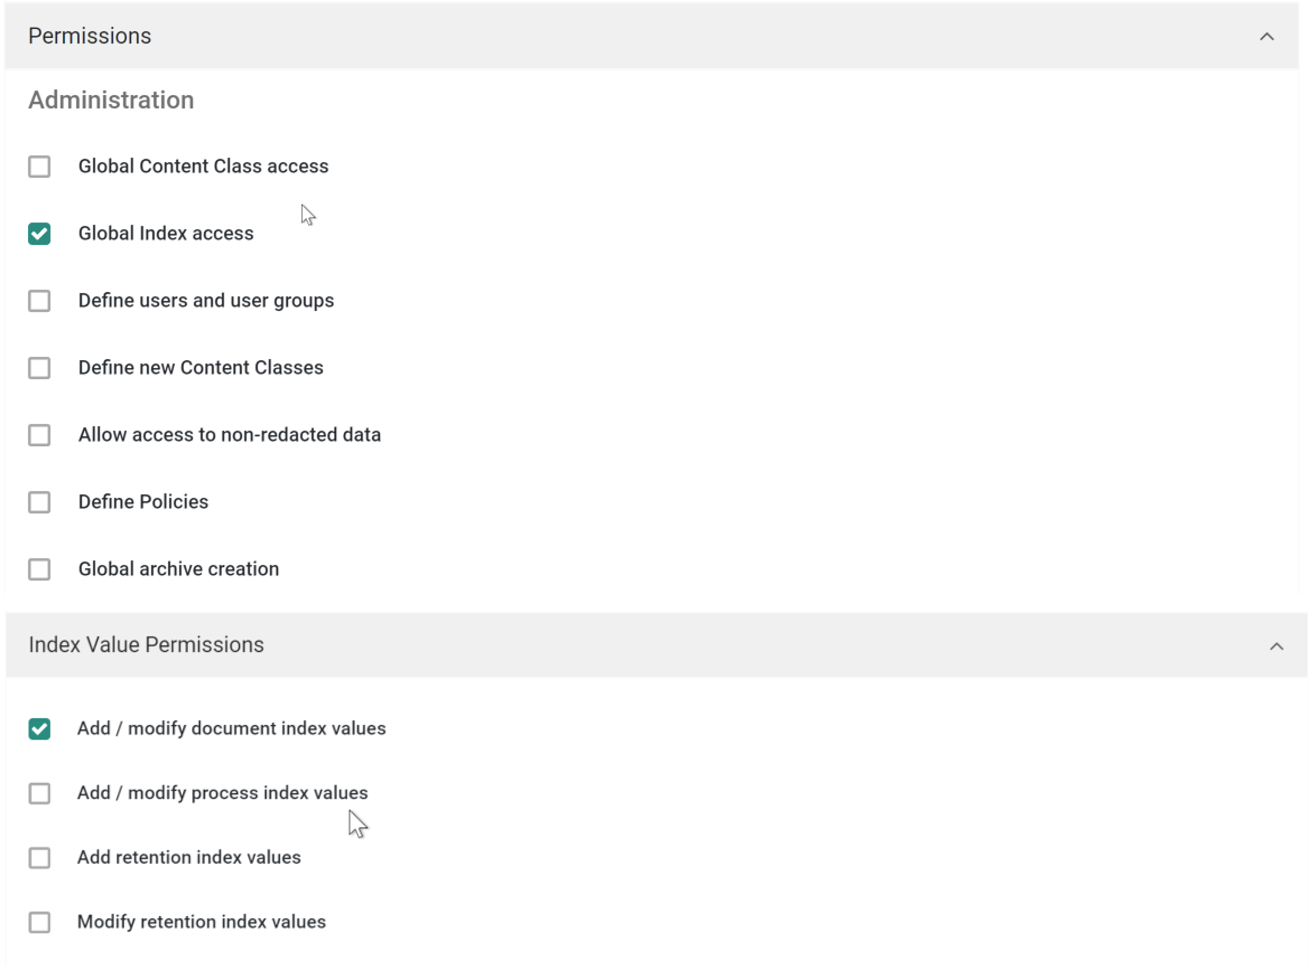
- Apply at least the following permissions required for editing metadata. Others can be added for additional functionality. Note that this is editable after creation.
5. Navigate to Mobius Admin > Content Repositories
- Go to Authentication and change the Type to Prompting (the default is Alias).
- Determine if there is an alias selected. In this case, you will automatically be signed in as that user, preventing you from switching between the Users created previously to test the permissions.

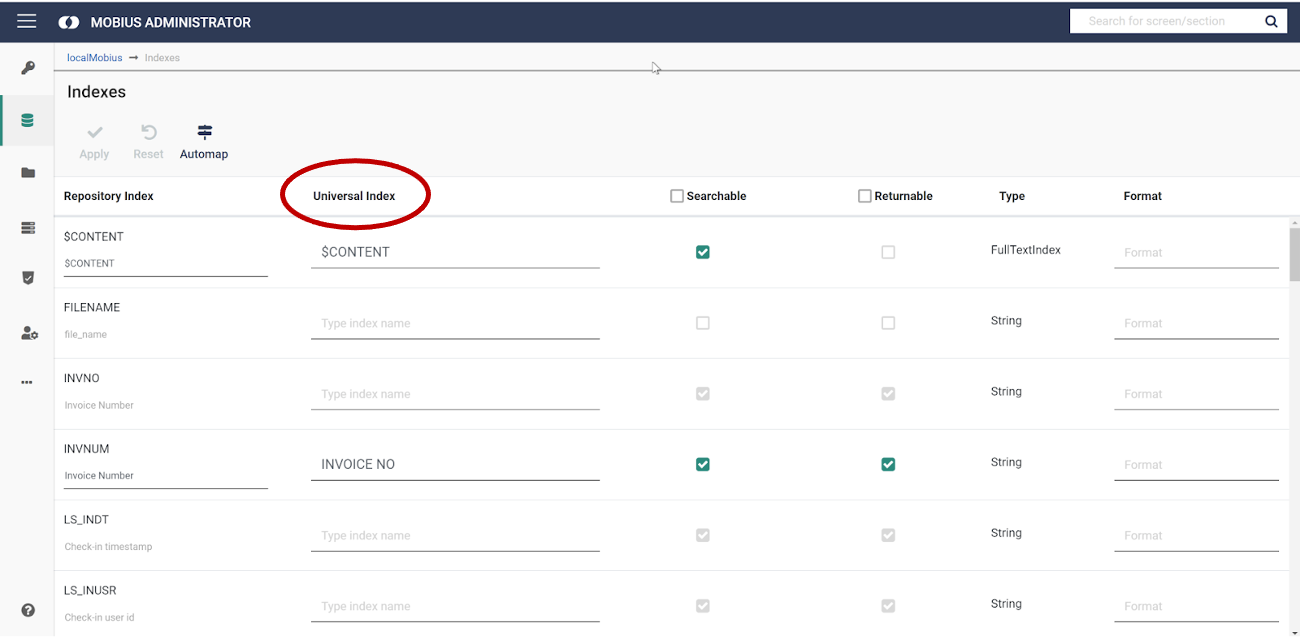
6. Create Index Mapping
- Select the Indexes button at the top of the screen. This will take you to a list of index mappings.
- Give each Repository Index a unique Universal Index for it to be usable. I recommend using the Automap button to assign them names from the Mobius repository, as that is already unique.
7. Give Permissions to Users
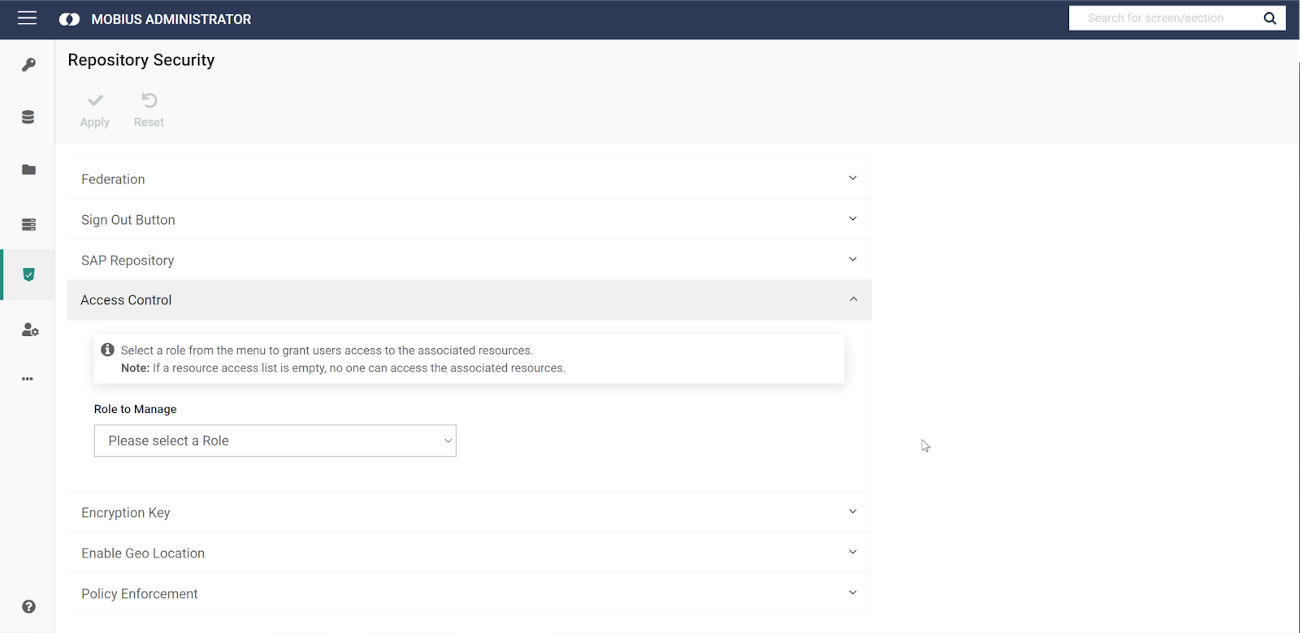
- Go to the Repository Security tab, and under Access Control give permissions to the users. Practice these two steps with the two users we created.
- Search for the MetadataCorrectionRequestor role, type in AlexRequestor, and press Enter
- Search for the MetadataCorrector role, select Group, type in SamCorrector, and press enter.
- Finish the process by selecting apply at the top of the screen.
8. Add Archives and Edit Metadata
- Use Archive Creator or Immediate Archiving to add archives with the appropriate Indexes.
- Login to Mobius View as the user, AlexRequestor.
-
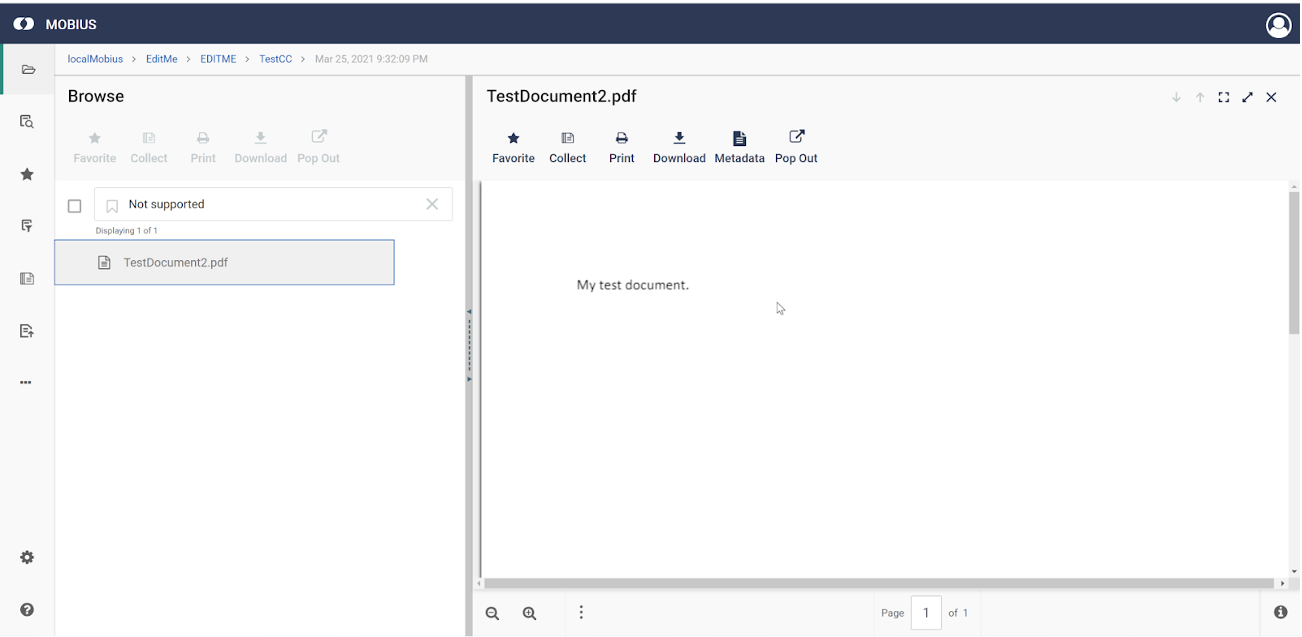
- Navigate through the Browse menu to the added document.
- Select metadata on the top of the image.
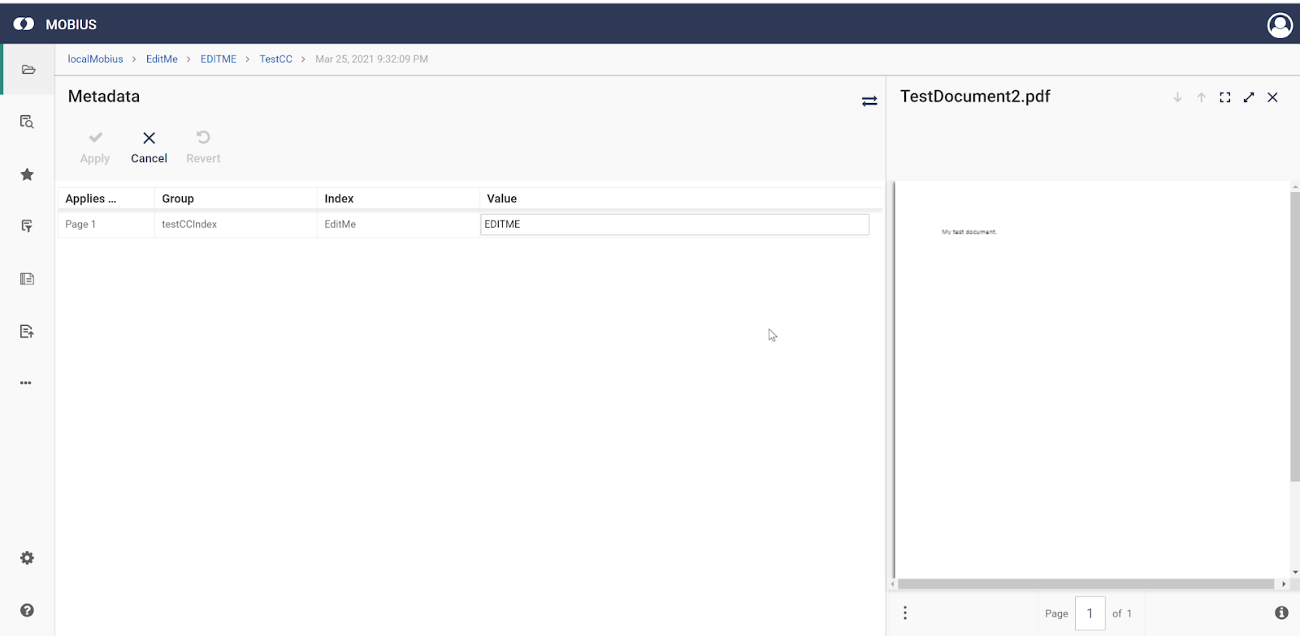
- Type in the chosen data and follow the prompt to request it.

- Logout as AlexRequestor and log back in as SamCorrector.
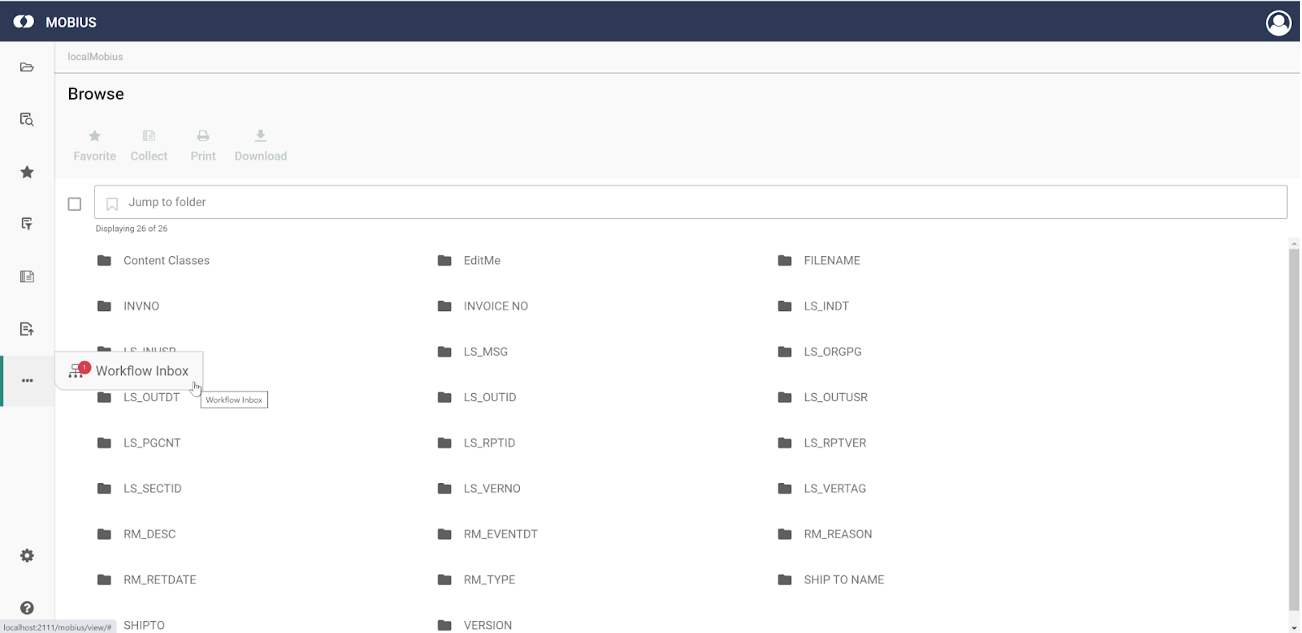
- Go to the Workflow Inbox tab. This may appear in the “…” menu.
- Observe what is in the Inbox and select Request for the information you want to view.
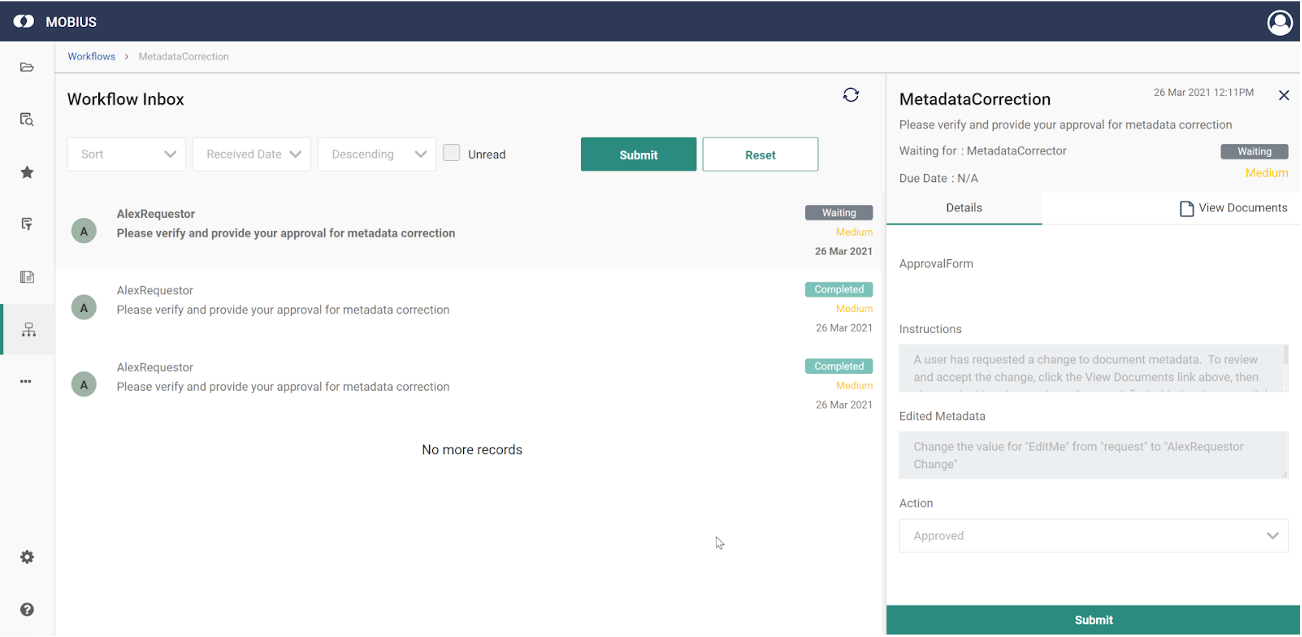
- Go to Metadata.

- Confirm the change.
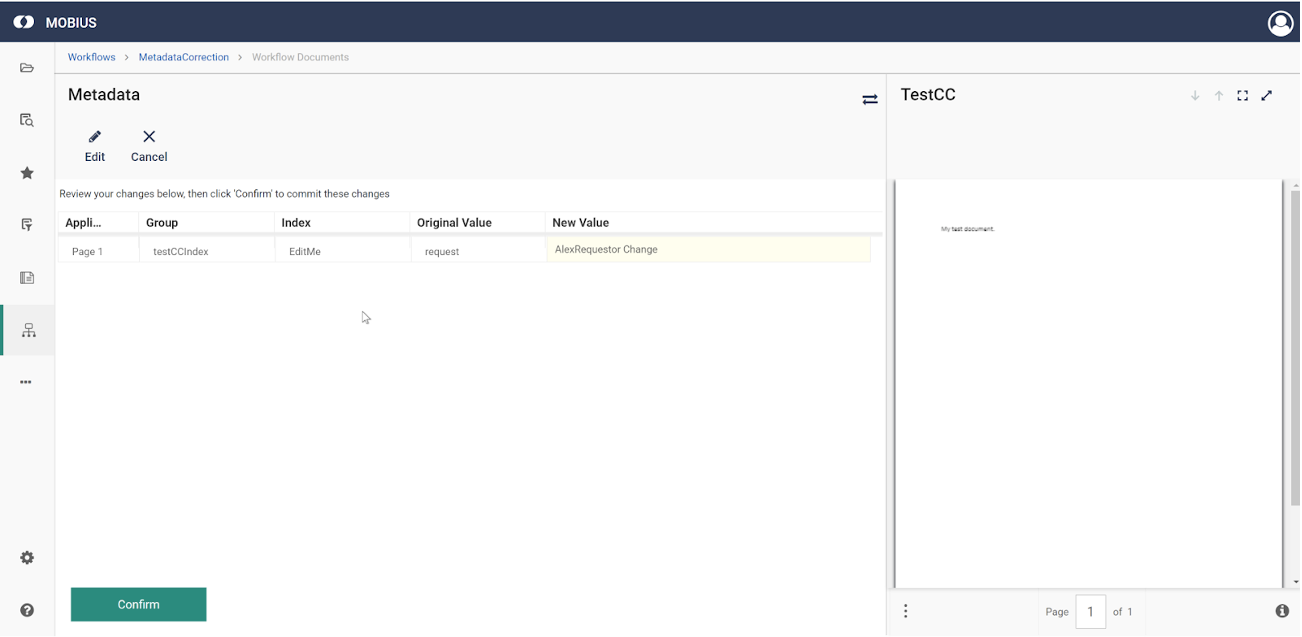
- Back out one screen and select Submit. Voila! Now you have successfully edited the metadata. This may take a moment to update across the system but should happen relatively quickly.