
This blog provides a tutorial for adding a custom dictionary to a batch class to increase Ephesoft OCR accuracy.
Background Information
This blog is for the Windows version of Ephesoft Transact that uses Recostar as the OCR engine. The Linux version of Ephesoft uses the Nuance OCR engine and does not work the same way.
The OCR settings for Ephesoft Transact are defined for each batch class and are not automatically shared between batch classes. After making edits, be sure to copy the updated files across all other relevant batch classes that need to be updated as well.

Jake Karnes
Zia Consulting,
ECM Consultant
The FPR.rsp can be opened in a text editor and edited as XML. However, Ephesoft provides a much better interface for updating this file: Recostar Design Studio. This program is provided at: <InstallRoot>\Ephesoft\Application\native\RecostarPlugin\RecoStarDesignStudio\RecostarDesignStudio.exe. It is recommended that you configure Windows to make RecostarDesignStudio.exe the default application for opening .rsp files.
Recostar Design Studio is a powerful application with many settings that can change the OCR results. This tutorial only covers the features necessary for adding and testing a custom dictionary. For more information about Recostar Design Studio, please reference the manual provided with Ephesoft here: <InstallRoot>\Ephesoft\Application\native\RecostarPlugin\Manuals\RDS_RecoStarDesignStudioTutorial_en.pdf.
Testing OCR Results in Recostar Design Studio
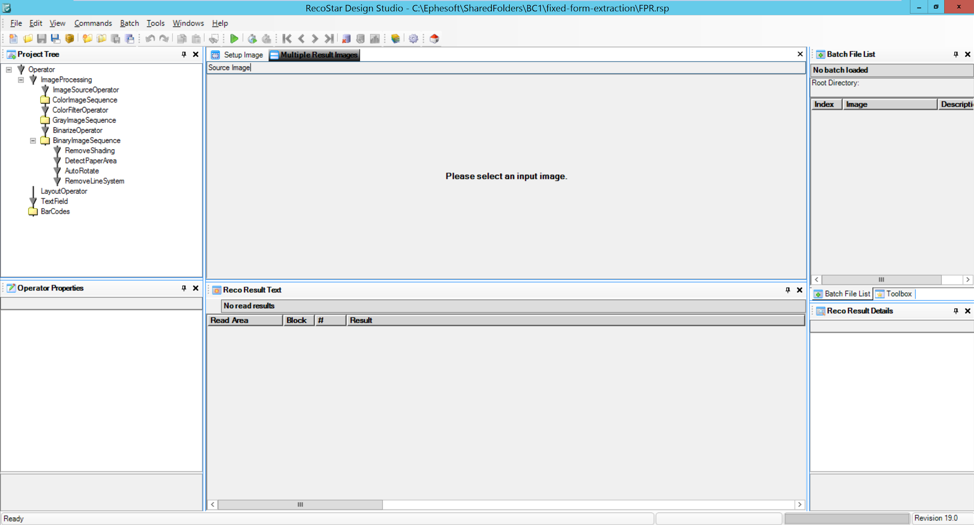
Begin by opening the batch class’ FPR.rsp file in Recostar Design Studio. The application should open to the following interface:
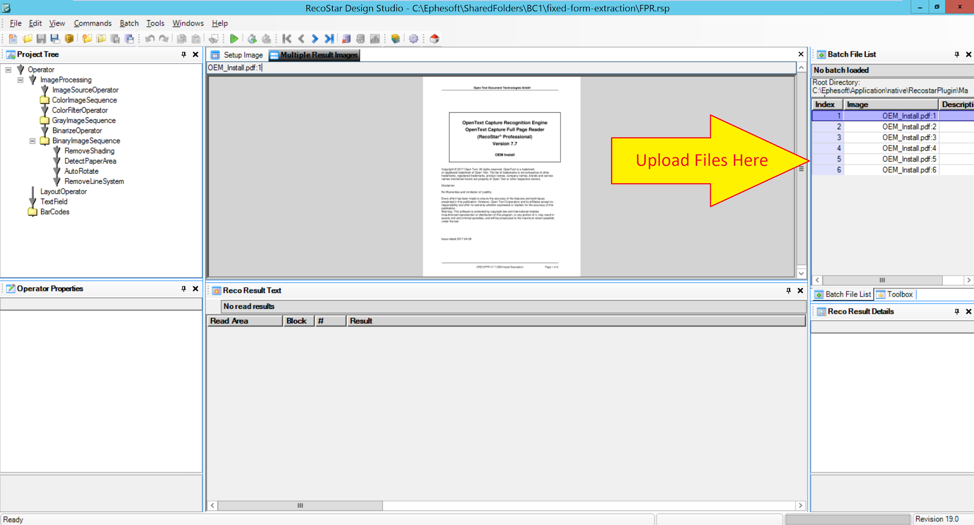
Sample files to be OCRd during testing can be uploaded into the “Batch File List” pane on the right side of the application. Simply drag-and-drop TIF or PDF files into the panel. Please note that Recostar Design Studio is designed for testing OCR configuration, not for bulk OCR of many files. The internal license will restrict the total number of pages which can be OCRd through the application at a time. Therefore, it’s recommended to test with a small number of samples, and perform bulk tests by uploading the samples into Ephesoft.
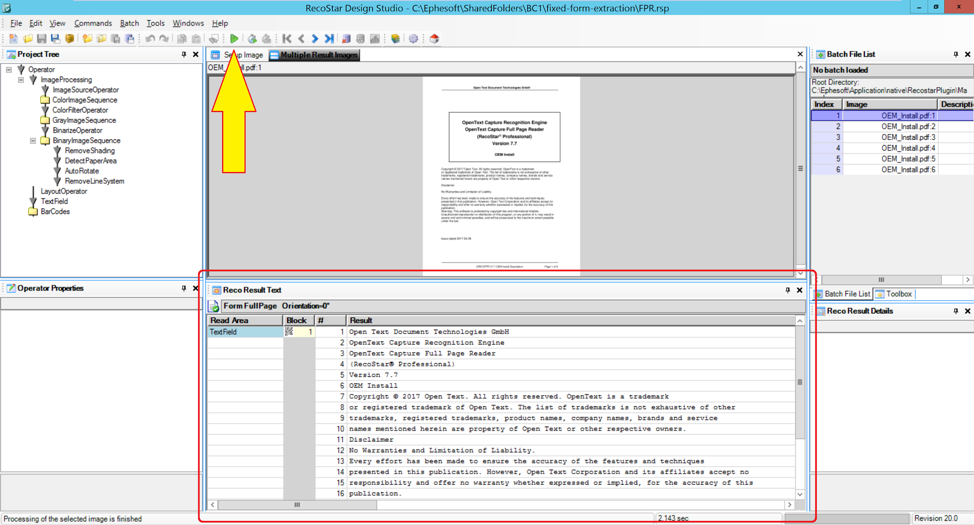
To get the OCR results from the sample before adding the dictionary, click the green “Run Selected Image” icon in the toolbar. The icon looks like a traditional “play” icon. This will produce OCR results for the currently selected sample.
The OCR results will appear in the bottom-center panel titled “Reco Result Text.” The results are organized into blocks and lines of text.
Creating a Custom Dictionary
The dictionary itself is created outside of Recostar Design Studio. A simple custom dictionary can be created as a .txt file, with one dictionary word per line. Although the filename isn’t strictly enforced, we’ll refer to this as dictionary.txt. When opened in notepad, it should look like the following:

The dictionary.txt file should be copied into the same directory as the FPR.rsp file. Its path will be: <SharedFolders>\<Batch Class ID>\fixed-form-extraction\dictionary.txt.
Adding a Custom Dictionary to FPR.rsp
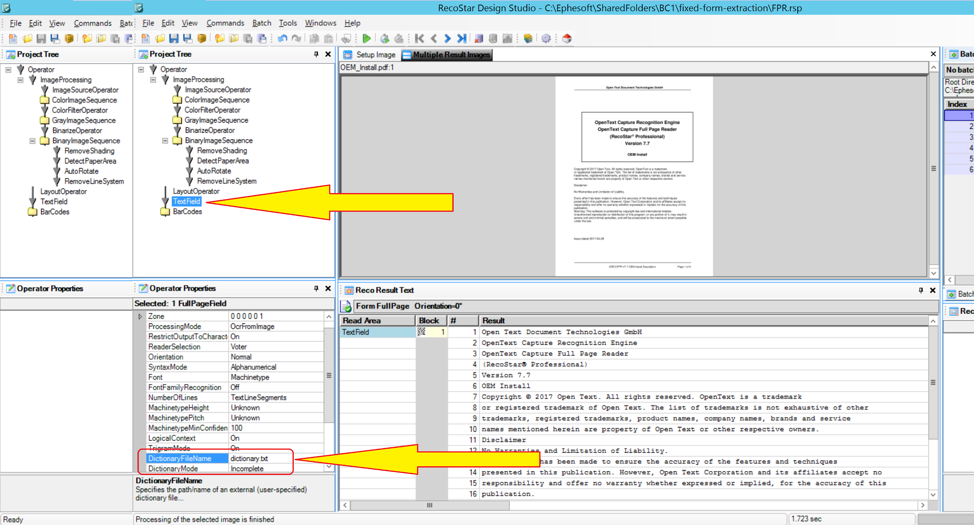
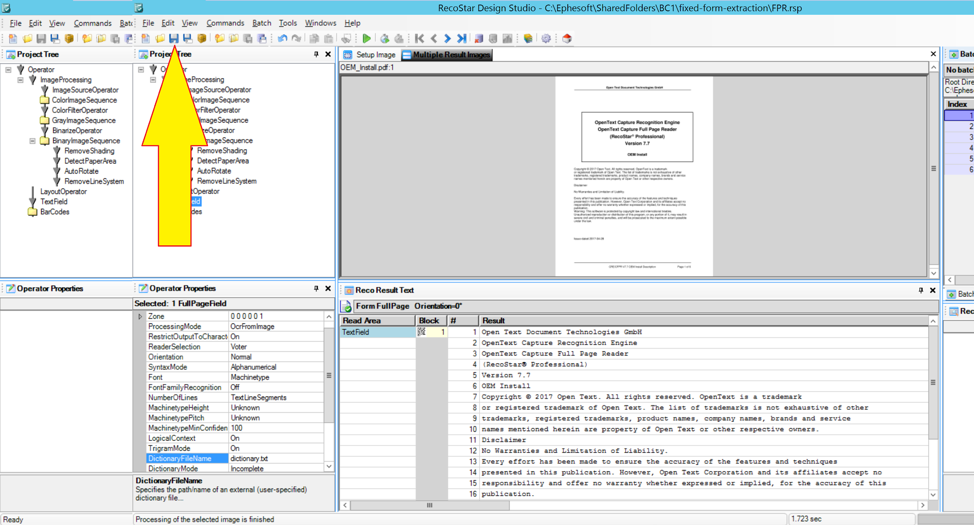
Now that the dictionary is created, the FPR.rsp file’s configuration must be updated to reference dictionary.txt. Back in Recostar Design Studio, click on the “Text Field” operator within the “Project Tree” panel on the left side. The “Operator Properties” panel below should now be populated. Scroll down to the “DictionaryFileName” property and provide the name of the dictionary file. In this case, it should be dictionary.txt.
With the dictionary added to the configuration, click the green “Run Selected Image” icon in the toolbar again to update the OCR results. After the results are returned, you can observe that a new dictionary.hex file has been created in the same directory as the dictionary.txt and FPR.rsp files. This is another indication that the dictionary was successfully included and utilized by the OCR engine.
Once this is complete, the changes can be saved to the FPR.rsp file by clicking the “Save” icon in the toolbar. After saving the changes, the dictionary will be utilized by all future batches processed by the batch class.
Custom OCR Dictionary Caveats
While the custom dictionary is utilized by the OCR engine to increase accuracy, it typically does not have a drastic influence the OCR results. If the document is already very clean (i.e., high resolution, clear text, etc.), then the OCR results will already be accurate and the dictionary is largely unneeded. Conversely, if the document is very degraded and highly pixelated, the OCR will be so difficult that the dictionary will be of little value.
Generally, the dictionary can be thought of as a tiebreaker—if the OCR engine is between two possible values for a word, it will favor the word which is found in the dictionary. For example, if the OCR engine is unsure if the word on the page is “university” or “universitv,”, it will favor “university” because it’s found in the dictionary. It is still possible that the OCR will produce incorrect results—even if the word is present in the dictionary. For example, the OCR engine may be very confident that the word is “universitv” even though as a human we can see that it should be “university” instead. This type of error is usually caused by the quality of the document itself (e.g., an underline cutting off the tail of the
“y” character).