
In this article, I will be working with ACS 6.2.0. You can get the helm chart versions at https://github.com/Alfresco/acs-deployment/blob/master/docs/helm-chart-releases.md. The helm chart version for ACS 6.2.0 is 3.0.3.
Prerequisites
The version details for the different components are mentioned in https://github.com/Alfresco/alfresco-dbp-deployment/blob/master/README-prerequisite.md. The versions of Kubernetes, kubectl, and helm should always be followed. Most of the major issues I ran into had to do with not having the correct version of the software.
The following commands have been tested on my Docker Desktop Kubernetes cluster that is deployed on macOS Catalina.
quay.io credentials:
Many ACS enterprise bits require access to a private repo in quay.io. Hence, open a support ticket with Alfresco and request the credentials.
Kubernetes Install:
The Kubernetes version will drive the correct version of Docker Desktop that we will need to install. As of writing this blog, the version of Kubernetes that is supported is 1.14.7. To get the correct Docker Desktop version, you should go to https://docs.docker.com/docker-for-mac/release-notes/ and download the version that has Kubernetes version 1.14.7. Currently, Docker Desktop 2.1.0.4 has Kubernetes version 1.14.7.
kubectl Install:
The kubectl version and the Kubernetes version should mostly be the same. To install the correct version of kubectl, follow the steps in https://kubernetes.io/docs/tasks/tools/install-kubectl/#install-kubectl-on-macos. For example, to get kubectl version 1.14.7, we will use the command
curl -LO https://storage.googleapis.com/kubernetes-release/release/v1.14.7/bin/darwin/amd64/kubectl
Helm Install:
The current supported helm version is 2.14.3. To install this version of Helm, you can run the command:
curl -L https://raw.githubusercontent.com/helm/helm/master/scripts/get | bash -s -- --version v2.14.3
Docker Desktop:
After the correct version of Docker Desktop is installed, you will need to do the following two changes to the preferences.
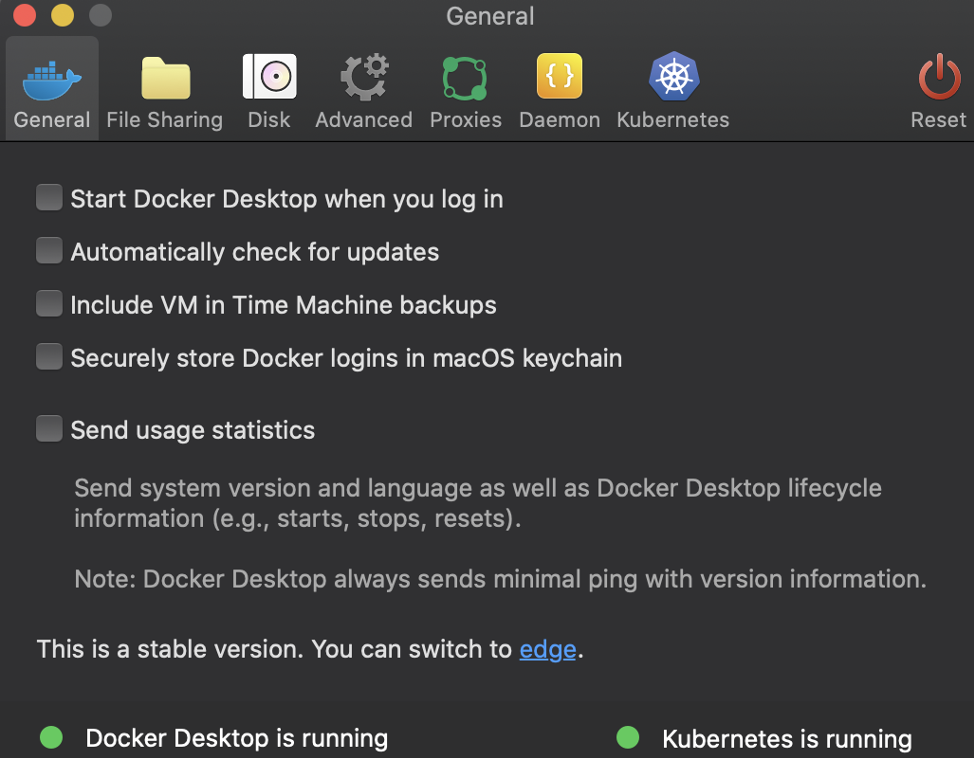
- Disable all the checkboxes in the General panel as shown below. At the very least, disable ‘Securely store Docker logins in macOS keychain.’
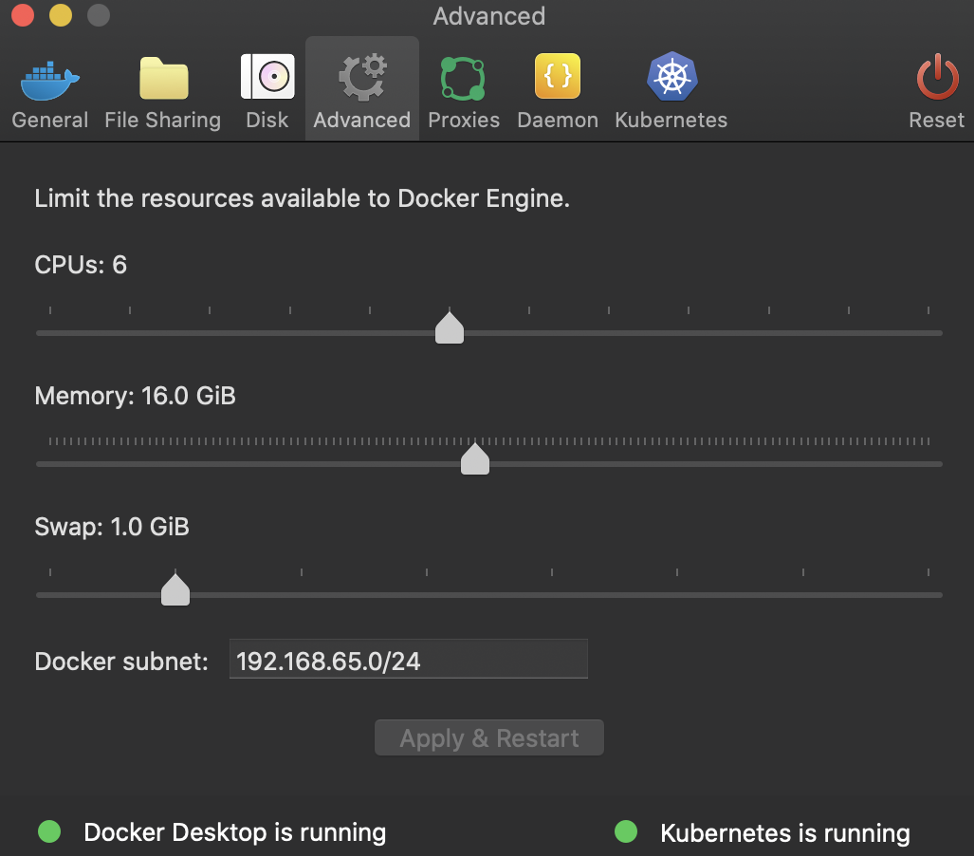
- Make sure you give enough resources to your Docker Desktop; at a minimum, 16GB RAM as shown below.
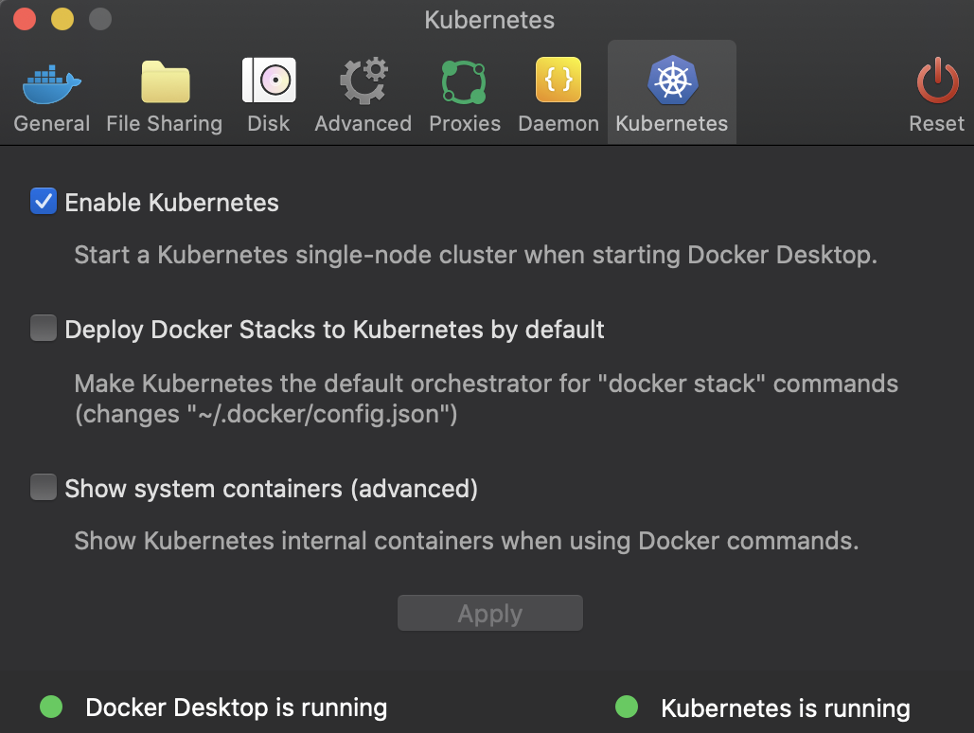
- By default, Kubernetes is not enabled. You have to enable Kubernetes as shown below. After you enable Kubernetes, it will take a few minutes to startup the default Kubernetes cluster.
Running ACS
After you have setup the prerequisites, you will need to go through the following steps to run ACS 6.2.0 in your Docker Desktop Kubernetes cluster:
- The docker-desktop context should be set. Run the following command to check the current context.
$ kubectl config current-context
- If the output is not ‘docker-desktop’, set the correct context using the below command.
$ kubectl config use-context docker-desktop
- Create Kubernetes secret using the quay.io username and password that was received from Alfresco support. This will be used to access images from the private enterprise repository. The values represented between <> are placeholders and will need to be replaced with your own information.
$ kubectl create secret docker-registry quay-registry-zia-secret --docker-server='quay.io'
--docker-username='{quay.io username}' --docker-password='{quay.io password}' --docker-email='{email}'
- When running ACS version 6.1.1.1 (helm chart version 2.1.0) and earlier, the secret name should be ‘quay-registry-secret’ and not any user-defined secret name.
- docker-email is optional.
- We will be deploying ACS using the helm charts. To do this, we will need to install tiller (the server side component of helm) to the cluster. To allow tiller permission to deploy to the cluster, we have to
- Create a service account in the kube-system namespace
$ kubectl create serviceaccount --namespace kube-system tiller
- Give the tiller service account access to the cluster by creating a cluster role binding.
$ kubectl create clusterrolebinding tiller-cluster-rule --clusterrole='cluster-admin' --serviceaccount='kube-system:tiller'
- Install tiller.
$ helm init --service-account tiller
- Add a new helm chart repository for Alfresco.
$ helm repo add alfresco-stable https://kubernetes-charts.alfresco.com/stable
- Since helm charts can be updated regularly, we will run the below command to update our local helm client.
$ helm repo update
- Install nginx as the ingress service for the ACS.
$ helm install stable/nginx-ingress --set rbac.create=true
- For ACS 6.1.0.5 (helm chart version 2.0.2) and earlier, this is required.
- For ACS 6.1.1.1 (helm chart version 2.1.0) and later, this is not required. If we decide to use the above command to create an external ingress, we can disable the default ingress created by ACS helm charts using key alfresco-infrastructure.nginx-ingress.enabled=’false’.
- We have some ability to customize the helm charts by updating the values.yaml file. ACS 6.2.0 uses helm chart version 3.0.3. The default ACS helm chart spins up two instances of the containers. Since we are only running this for our local development, we can update the values.yaml to only spin up one instance. We can download the values.yaml file and update the replicaCount to one using the below commands.
$ curl -O https://raw.githubusercontent.com/Alfresco/acs-deployment/3.0.3/helm/alfresco-content-services/values.yaml

$ sed -i '' 's/replicaCount: 2/replicaCount: 1/g' values.yaml
- Using the updated values.yaml file, we can spin up our ACS 6.2.0 in our local Kubernetes cluster using the below command.
$ helm install alfresco-stable/alfresco-content-services \
--set global.alfrescoRegistryPullSecrets='quay-registry-zia-secret' \
--set alfresco-infrastructure.nginx-ingress.enabled='false' \
--set externalProtocol='http' \
--set externalHost='localhost' \
--set externalPort='80' \
--version='3.0.3' \
-f values.yaml
- global.alfrescoRegistryPullSecrets is used to set the initially created secret name.
- When running ACS version 6.1.1.1 (helm chart version 2.1.0) and earlier, use registryPullSecrets instead of global.alfrescoRegistryPullSecrets.
- alfresco-infrastructure.nginx-ingress.enabled is used to disable the ingress that is automatically created by the ACS helm chart.
- Version is set to point to the helm chart version 3.0.3 that corresponds to ACS 6.2.0.
- After the pods are running, we will be able to access Alfresco using the link ‘https://localhost/alfresco’.
- You can check the status of the pods starting up using the command.
$ kubectl get pods
- By default, the necessary volumes for ACS are created at ~/.docker/Volumes. During a redeploy, new volumes are auto generated. These volumes are not persisted between redeployments. Hence, any new data that is added will be lost after a redeploy.
Cleanup
When we run helm install multiple times, the installer will create new volumes every time. To clean up and purge the all the helm installs, we can run the below command.
$ helm delete $(helm list -aq) --purge
When we switch between different versions of helm charts, I have found it is safer to reset the Kubernetes cluster as highlighted in the screenshot below. Even though this is not required, I have found that this helps clear out some unexpected errors when working on multiple helm chart versions.

Conclusion
This article shows the user how to quickly run ACS in a Kubernetes cluster. Any new data that is created in the cluster will not be saved between subsequent helm installs. We will walk through the steps needed to save state between multiple helm installs in the next article.