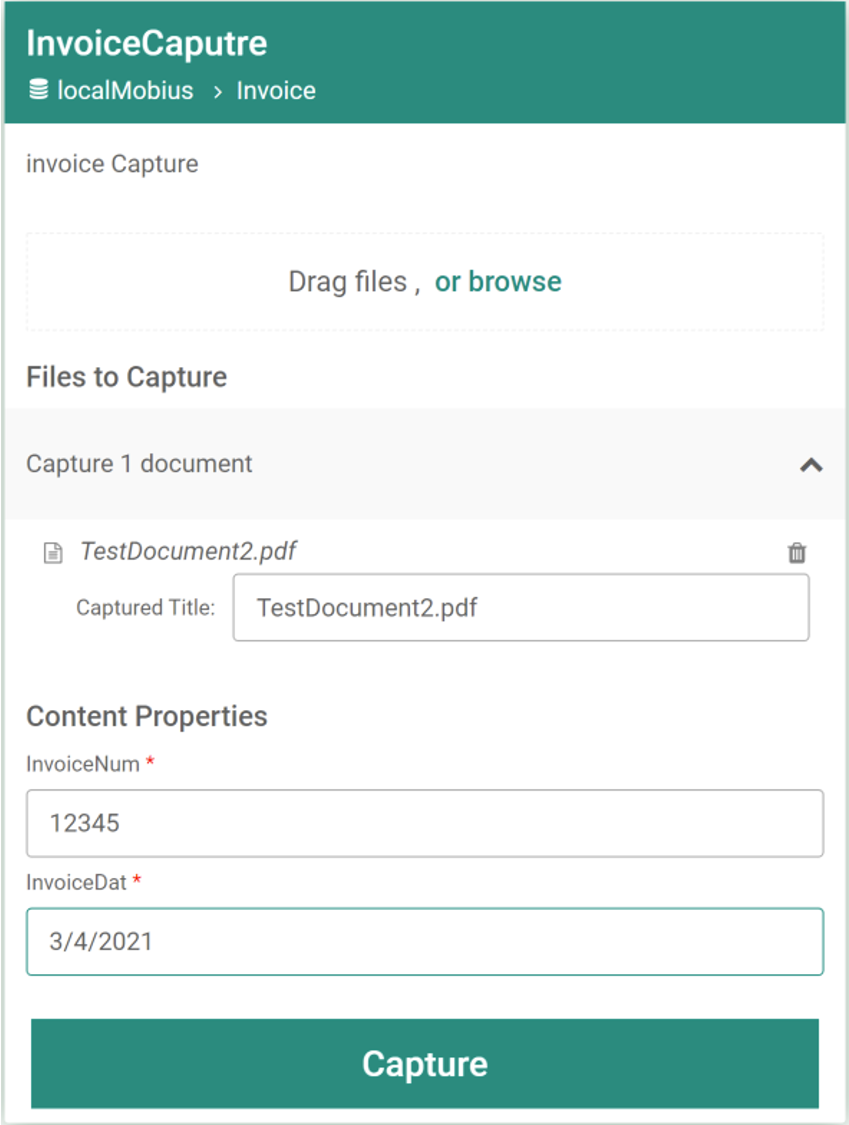
ASG Mobius 10 introduced an “Immediate Capture” feature that allows users to upload documents and their metadata for immediate ingestion into a Mobius system. This blog shows you how to do this for a sample document.
To follow along with this blog, you will need:
- An installed version of Mobius 10 (or newer). I am demonstrating using Mobius 11.
- The login information to get into Mobius Admin and the Mobius Server. The defaults are, respectively, admin/admin and ADMIN/<blank>
Again, I am using the latest version of Mobius at the time of writing this (Mobius 11). If you are using an earlier version, your screens may appear slightly differently.
1.) Navigate to Mobius Admin.
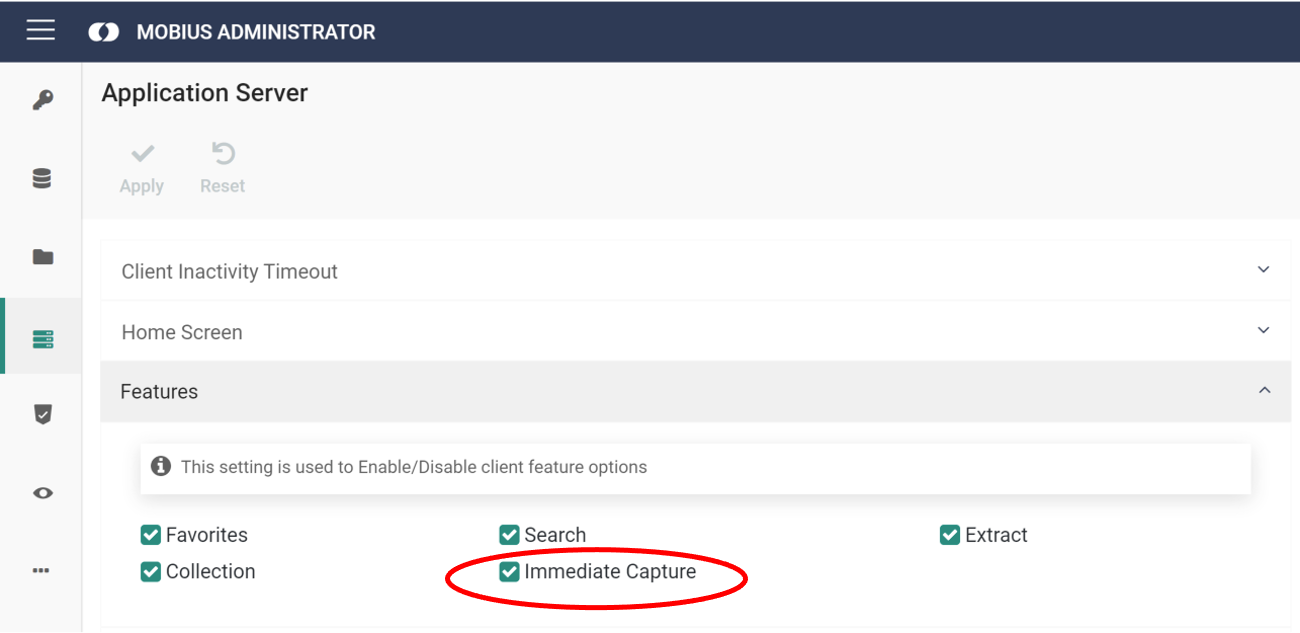
2.) Navigate to Application Server and in the Features section ensure that Immediate Capture is enabled. This makes sure that the Immediate Capture menu will appear to end users on Mobius View.
3.) Navigate to the Mobius Server menu and login again. It will look something like this:
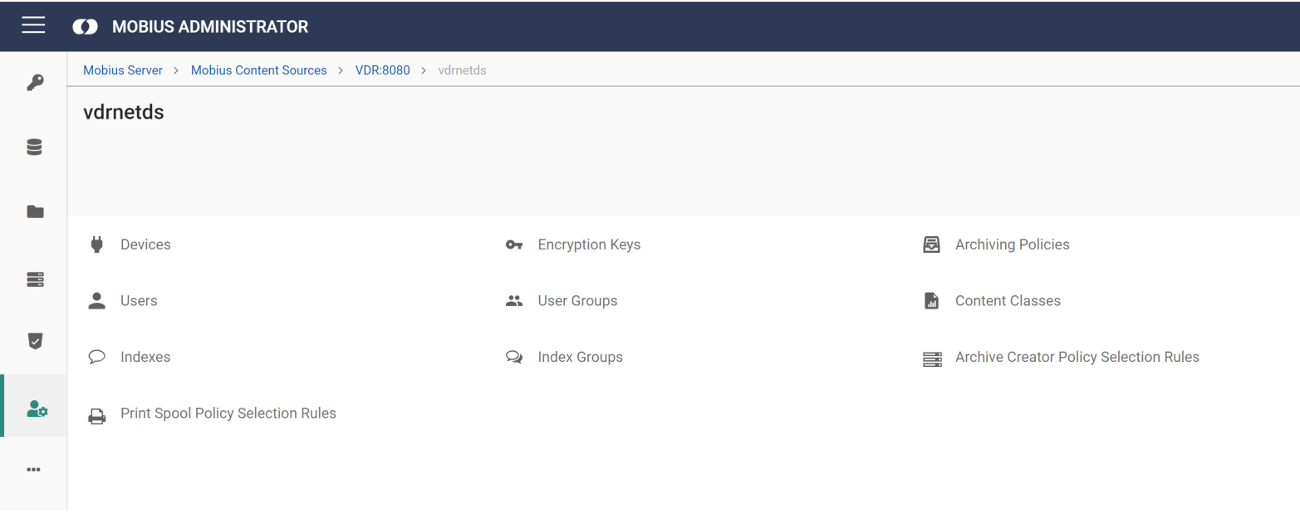
4.) Create the Content Class that you want to ingest using Immediate Capture. If it already exists, skip this step.
a.) If creating a new Content Class, make sure to give it a template path for where to store it ending in “.DAF”.
5.) Create the Index(es) that you will be capturing. If they exist, skip this step.
a.) These can be individual indexes or index groups, but remember: if you want to enable metadata correction (Mobius 11+), index groups are required in order for that to work. If you create index groups in your database, it will still use memory, even if there is no data.
6.) Create the user who will be accessing the Immediate Capture.
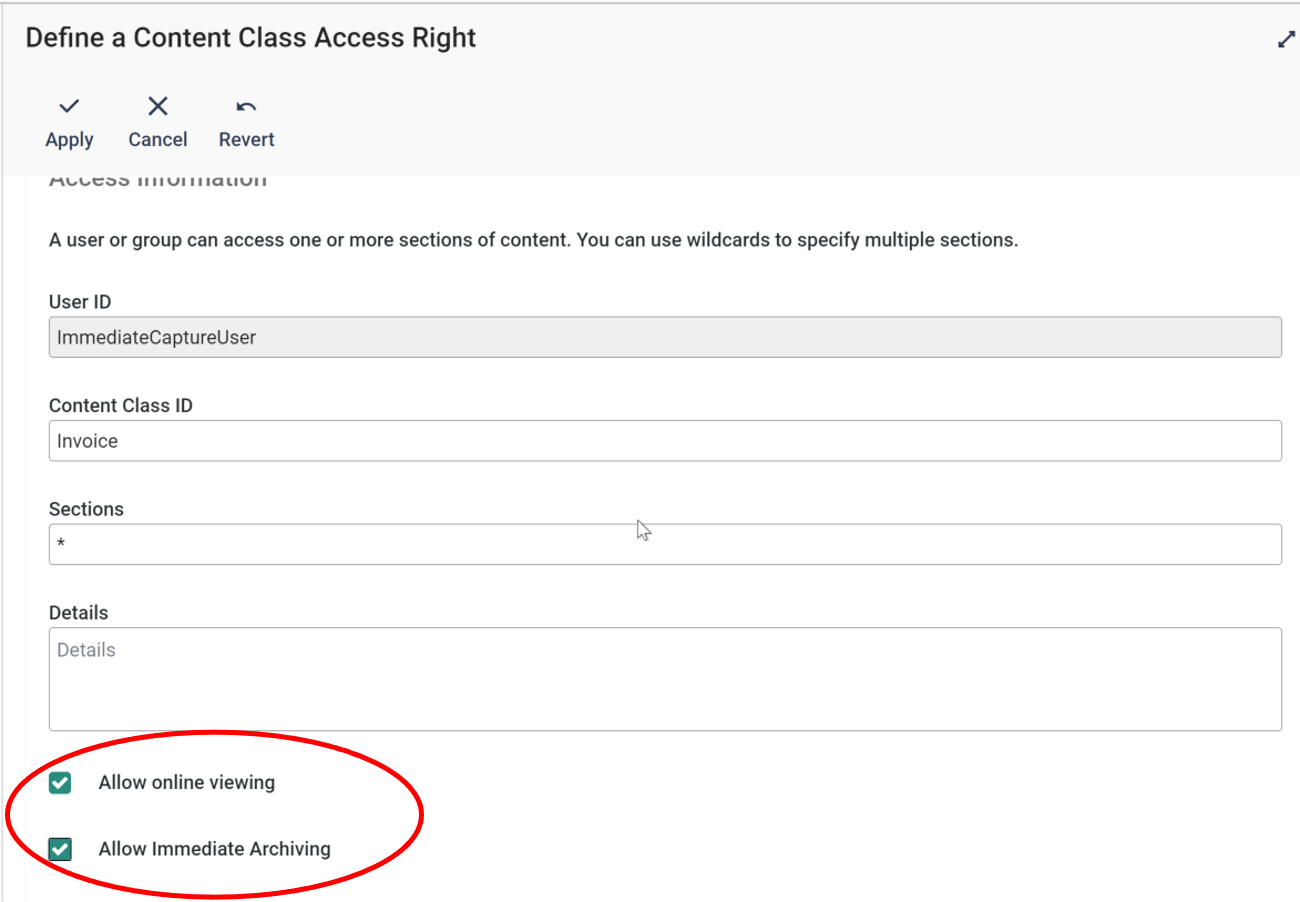
a.) Grant them access to the Content Class and the Indexes.
b.) When granting access to Content Class, ensure that “Allow Immediate Archiving” is selected.
c.) In Permissions, make sure they have at least “Global Archive Creation” allowed.
7.) If you added Indexes, navigate in Mobius Admin to Content Repositories > Indexes and map your new indexes. I recommend the Automap feature, as this will always guarantee that your names are unique.
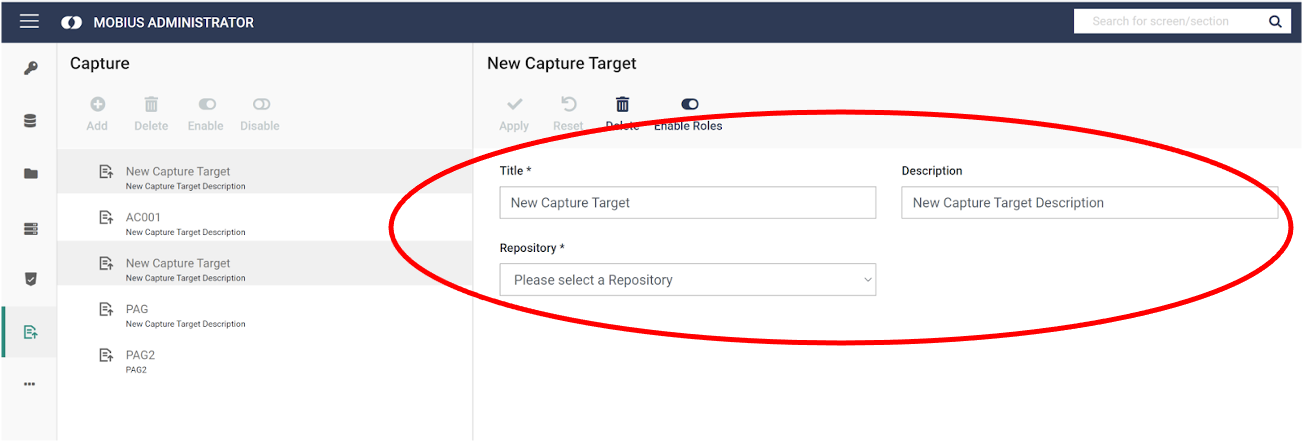
8.) In Mobius Admin, navigate to Capture and select Add. Enter in the title and description and select your repository.
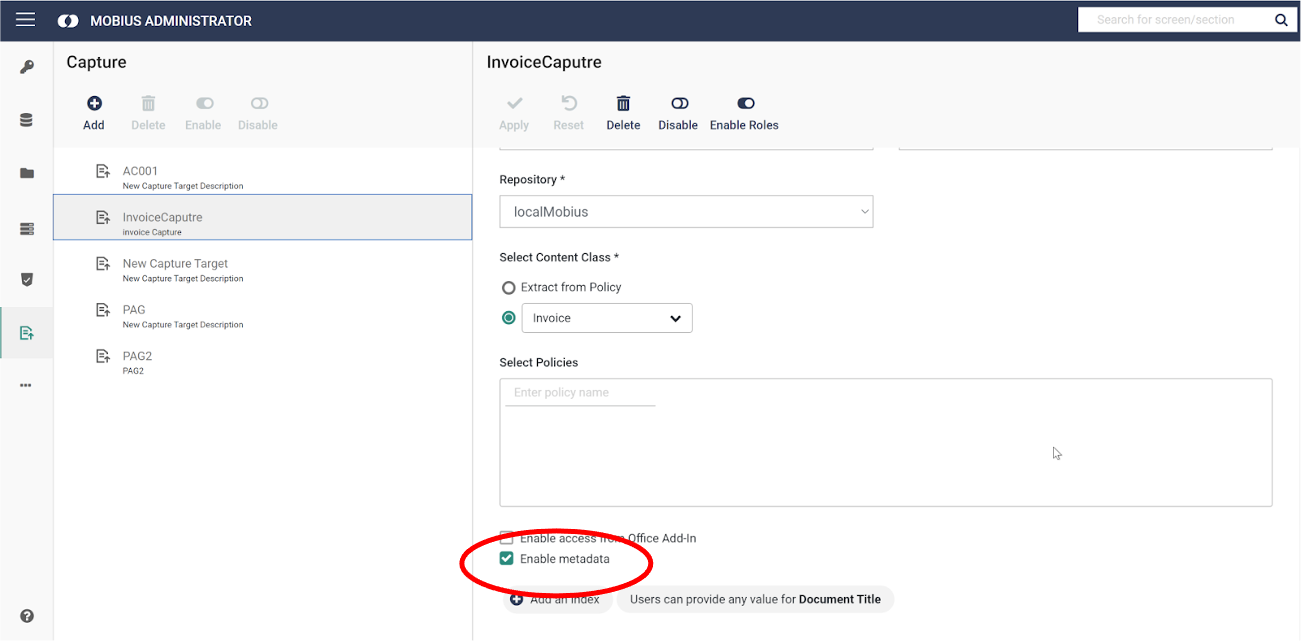
9.) Your screen will update and you will pick a few of the options. I do not have a policy created for this Content Class, so I selected it directly and left the “Select Policies” portion blank. I also unchecked “Enable access from Office Add-In,” as this is not set up for me at this time and will cause creation of this Immediate Capture rule to fail. If you want users to add metadata when capturing content, leave Enable Metadata checked, and add the Indexes for the metadata you want to capture. When you are done, select Apply.
a.) A note: the fourth button is currently labeled “Disable.” When it looks light like this, the Immediate Capture Rule is active and able to be used. It is currently the default, so be aware when creating.
10.) Now that your user is able to use Immediate Capture, open Mobius View, navigate to Immediate Capture, select the Immediate Capture rule, and select a document. When the document loads, add metadata in the form and press Capture to submit. When submitted, your document will be available to anyone with the correct permissions.
